


Check where the shoe is loose before adding padding
Wear the socks you plan to use, settle your foot into the shoe, and take a few steps on a clean surface within the return policy. Notice whether your heel lifts slightly on some steps or almost comes out each time. Those are different fit problems.
If the toe area is tight and your heel still slips, a pad at the back may push your foot farther forward. The shoe’s shape may be a poor match for your foot even if there’s extra room in one area.
If your whole foot slides, the sides are loose, and there’s more room at the toe than you can manage comfortably, one small heel pad is unlikely to resolve all three. Ask about an exchange or have the seller check the fit before sticking anything inside a new pair.
With adjustable laces or straps, check that they’re fastened correctly. See our guide to tying sneakers for the basics. Tighten them only as far as is comfortable.
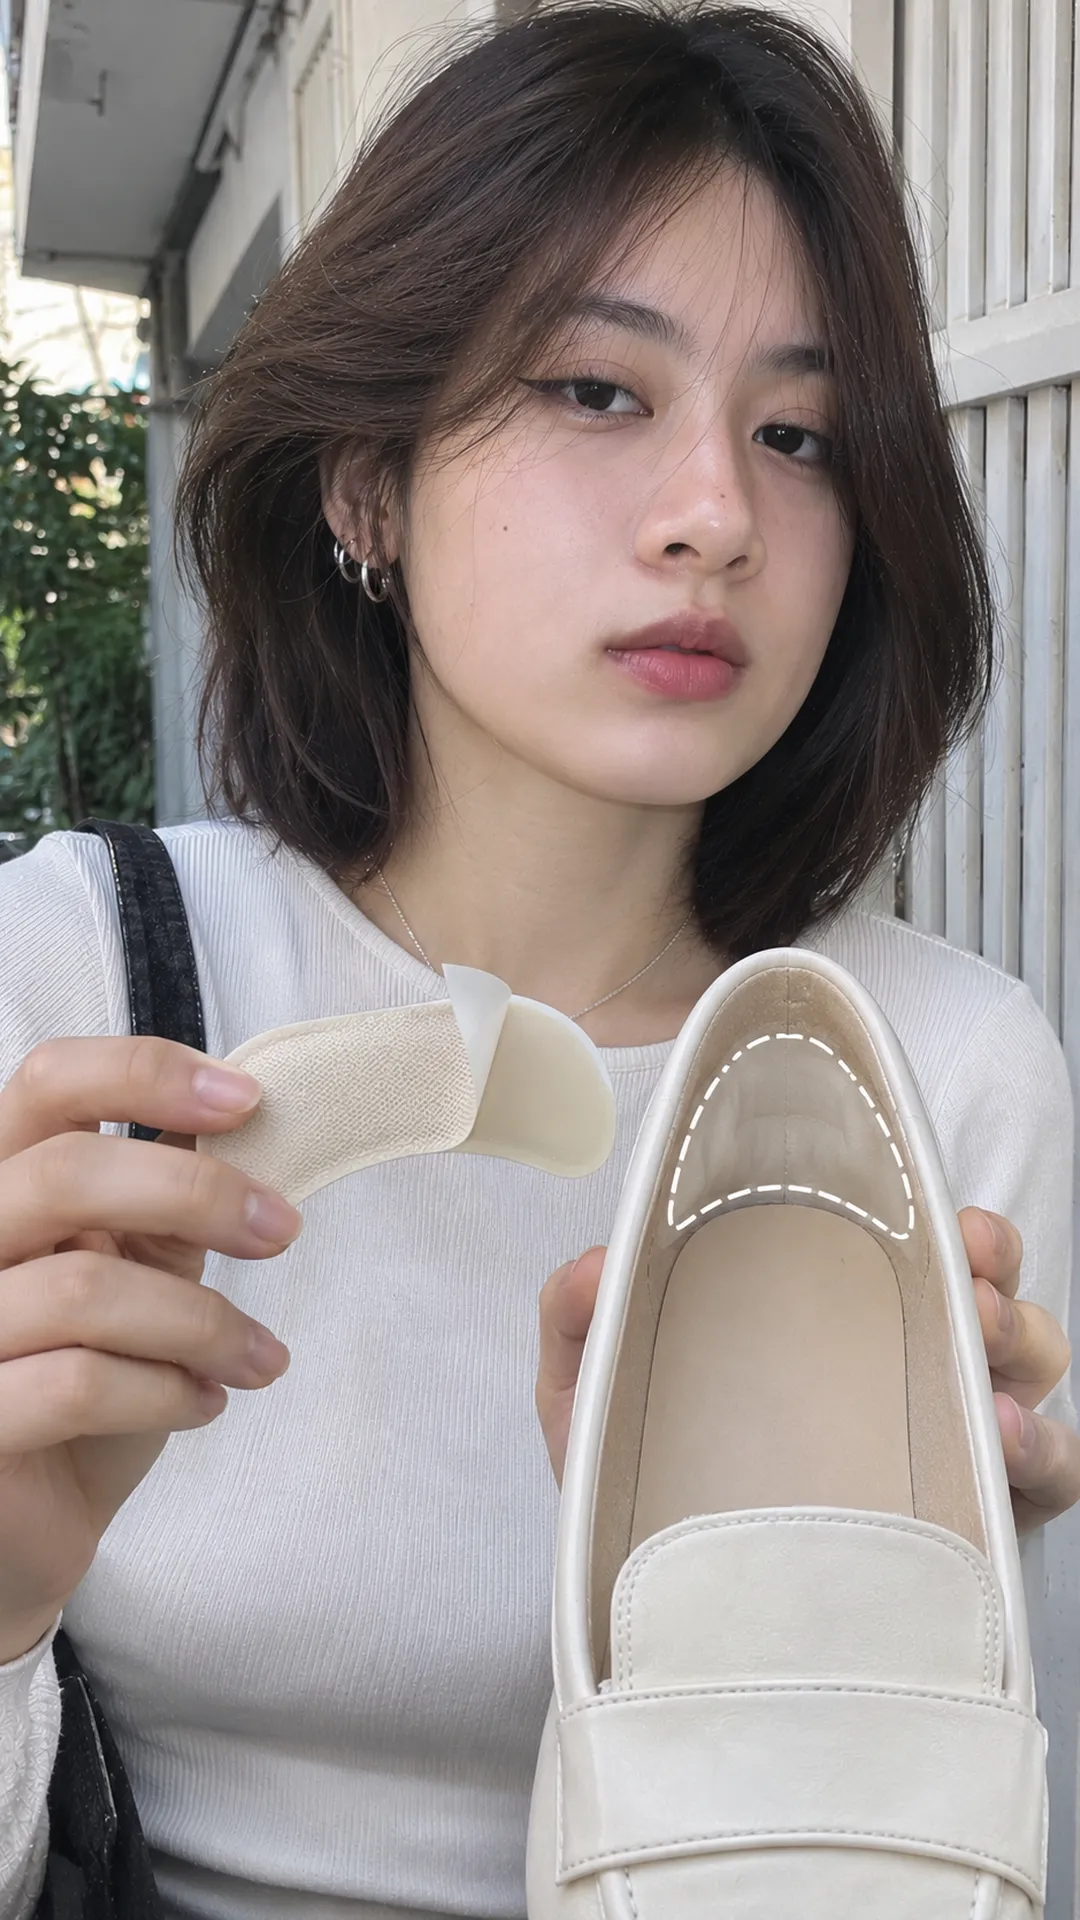
Heel grips, under-heel pads, and full insoles
An adhesive heel grip goes on the inside back wall of the shoe and cushions the area behind the heel. These are commonly sold for shoes that slip at the heel. Shape, thickness, and compatible shoe types vary.
An under-heel pad sits on the back of the footbed. That raises the area beneath the heel. Use it where the instructions specify, since it changes the fit differently from adding a layer to the back wall.
A full-length insole covers most of the footbed and takes up space across the shoe. Some replace the original insole and others have their own fitting instructions. Check those instructions before stacking insoles or adding other pads.
A forefoot pad sits in a separate area. If the seller describes it simply as an anti-slip pad, check the placement photos and instructions. Pick a product for the area that needs it. Adding several at once makes it difficult to tell what changed the fit.
Choose a grip for the heel shape and lining
Check the height, curve, and usable surface inside the heel. A tall pad can show above the edge or fold over when you put the shoe on. A wide pad may bend around a curve it’s unsuited to. Compare actual dimensions against the intended position.
Choose a thickness that fits the gap. A thicker pad leaves less room elsewhere in the shoe. Start with a product that gives clear dimensions and fitting instructions.
Check which surfaces the adhesive is designed for. Fabric, leather, synthetic coatings, and peeling linings can react differently. A strong adhesive can still fail on some linings or leave marks when removed.
Check the instructions to see whether the pad can be trimmed, removed, or reused. If trimming isn’t allowed, exchange an unsuitable shape for one that fits as sold.
Our alt fashion shopping guide explains how to check descriptions and policies. For adhesive accessories, read the return terms for both the grips and shoes before peeling away the backing.
Apply a heel grip step by step
Dr. Scholl’s instructions for heel liners recommend choosing the right shoe type, clearing dust from the inside, peeling the backing, placing the liner against the inside heel wall, and pressing it in place. Follow the instructions for your specific product.
- Check the heel lining. If it’s peeling, torn, or has an unusually hard area, have the shoe checked first. A heel grip has a specific fitting purpose.
- Prepare the surface. Clean the area according to the instructions for the shoe and pad. Avoid strong solvents unless you know they’re suitable for the lining.
- Check placement with the backing still on. Hold the grip where you plan to stick it to check the direction and edges. Keep the pad out of the shoe while trying it on until it can be secured.
- Peel and place the grip. Remove the backing as directed, avoid handling the adhesive more than necessary, and position the grip neatly. Check for curled edges or folds.
- Press and wait as directed. Follow the product’s instructions on pressure and waiting time. If they’re unclear, ask the manufacturer or seller.
- Check the fit again. Slip your foot in carefully so you don’t dislodge the pad. Stand and walk in a safe area, checking the forefoot as well as heel slip.
Fit each side to the shape of its shoe. Check the contact points separately, and use how the shoes feel and the product instructions to decide whether the pads work.

Test the fit while moving
The shoe can feel snugger while you stand even if the grip shifts when you walk. Take a few steps, change direction, and sit and stand again. Stop using the pad if it rolls, slides, or creates a pressure point. Check placement and compatibility.
Check your toes and the front of the shoe. If your foot is crowded, the shoe feels tight, or you have to change how you walk, reassess the fit before adding more pads. Each layer changes the available space.
In heels, consider forward slip and heel looseness together with the slope, toe shape, and how the shoe holds your foot. Our guide to choosing high heels explains those parts of the design. Walk in the full pair after fitting a grip.
A short trial gives you limited information about a full day or different surfaces. If you plan to wear the shoes to an event, test them in advance within the permitted conditions and have another pair available if needed.
Common mistakes when using heel grips
Peeling and reapplying the pad several times: Check whether it’s designed for reuse. A single-use pad may still feel sticky to the touch after removal and adhere less securely inside the shoe. Follow the replacement and removal instructions.
Applying it to an unsuitable surface: Dust, peeling lining, or a sharp curve can keep the grip from lying flat. Ask what will work with both the shoe and the pad before adding any other adhesive.
Choosing thickness based on a shoe size: A pad won’t reliably reduce every shoe by half a size or a full size. Shape, materials, and the location of the extra room vary. Read any size-equivalence claims for the specific model.
Continuing to wear shoes that press or rub: Take the shoes off and check what’s causing the discomfort. Use a pad only if it improves how the shoes feel without adding a new pressure point.

When to replace the pad, check the fit, or change shoes
Check the pads regularly based on how often you wear the shoes and the manufacturer’s guidance. Look for peeling edges, wear, or movement before the pad comes off during use. Replacement intervals depend on material and wear.
Follow the removal instructions to protect the lining. If adhesive remains, ask the maker or a shoe repair shop what’s suitable. Avoid scraping with a sharp object or soaking the entire shoe. Clean removal depends on both the adhesive and the lining.
If your heel still slips a lot, your forefoot is tight, or you have to change your stride, have the fit checked or exchange the shoes if you can. A heel grip works best for a small gap that suits its design.
Our women’s shoe guide compares shoe styles by construction and use. Once the fit works, you can decide how to style the shoes and how often you’ll actually wear them.
Locate the gap, choose the right type of pad, apply it as directed, and check it in motion. If the result is uncomfortable or unstable, stop using the pad and reassess the fit before going thicker.