

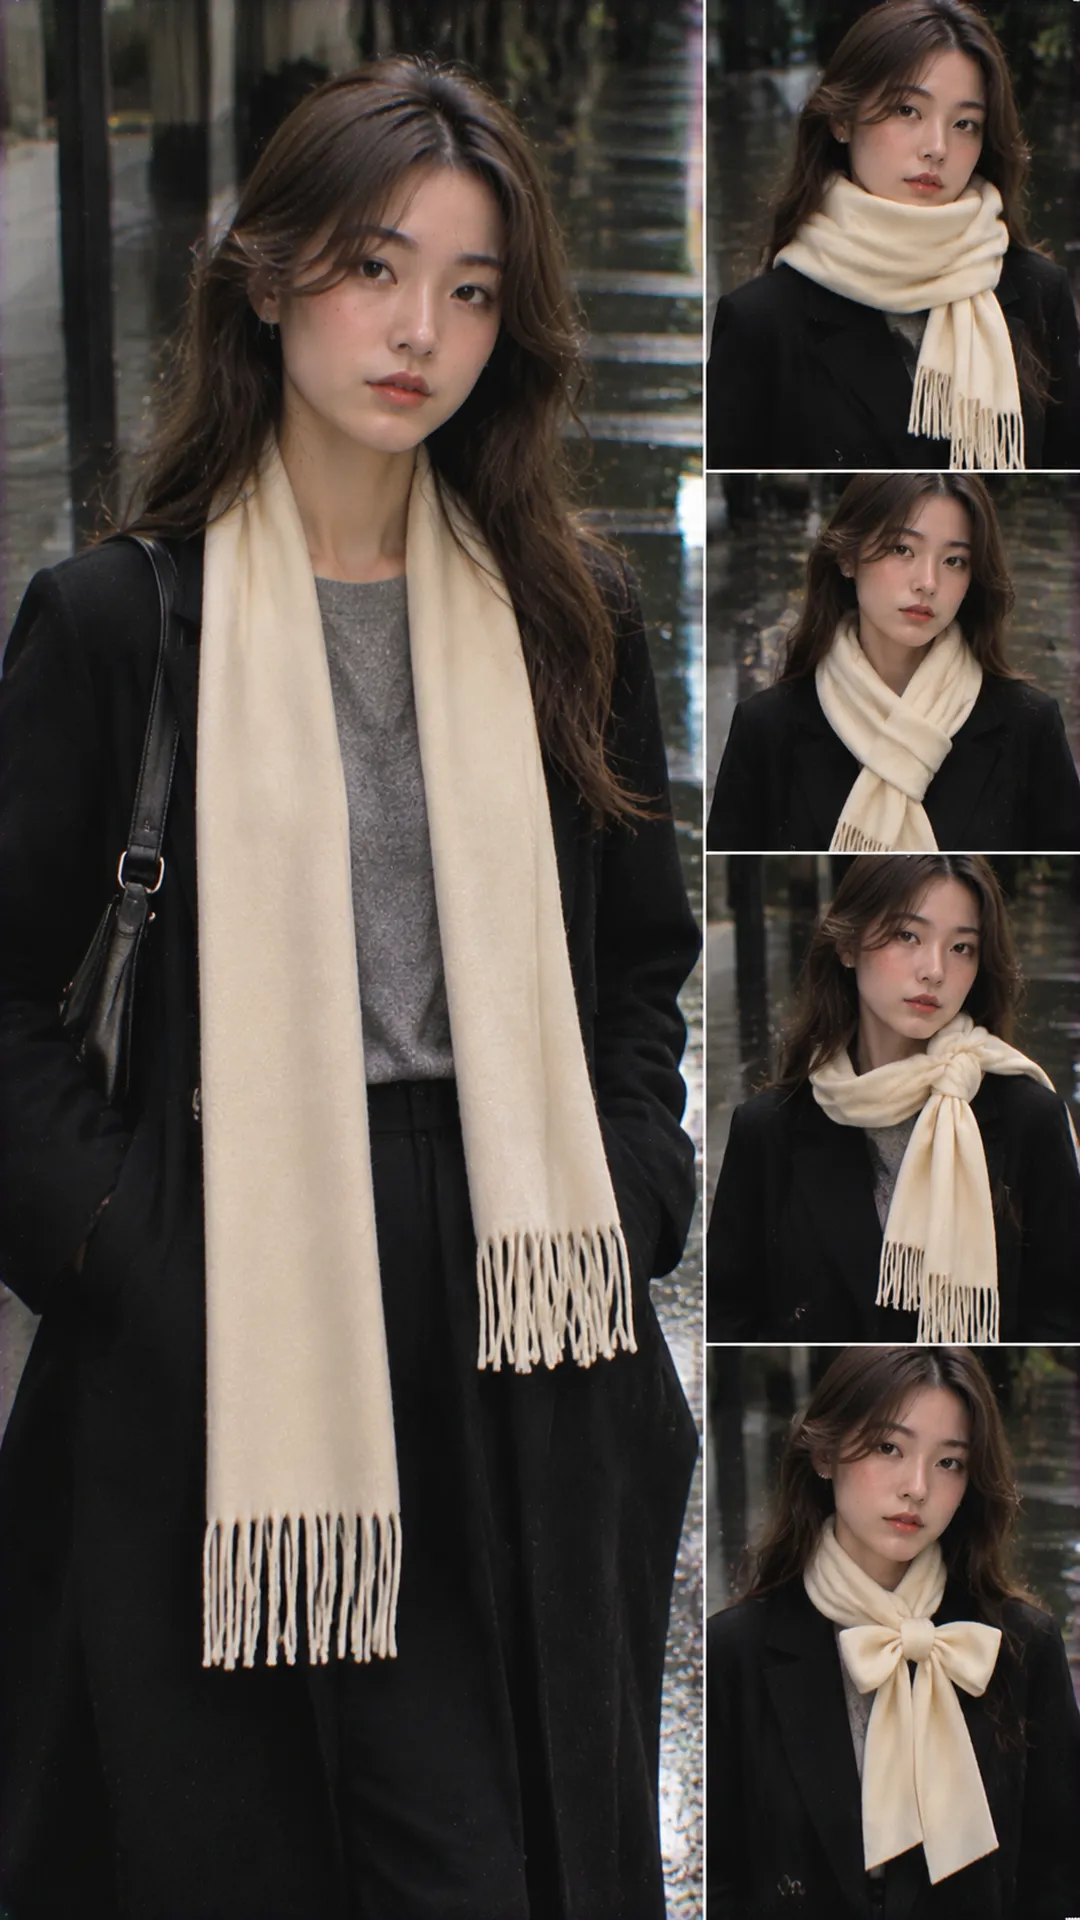
Choose the width of the scarf before tying it
Lay the scarf out and look at its shape and edges. A long, narrow scarf may be ready to wear. Fold a wide rectangular scarf lengthwise into a band. Keep the folds loose and even so it’s easy to adjust later.
If it has fringe, check for tangles and see whether it catches on jewelry. If it has a colored border, fold it so the border shows along the edge. Turning the scarf over or changing the fold width can change the look with the same knot.
Thickness determines the size of the knot. A chunky knit usually works better with fewer wraps than a knot with several layers. A thin scarf can make a compact knot, but a smooth finish can slip. Check it against the garment you plan to wear.
Our guide to choosing a women’s scarf covers fabric, dimensions, and intended use. With the scarf in hand, decide whether you want warmth, a vertical line, or a touch of color around the neck.
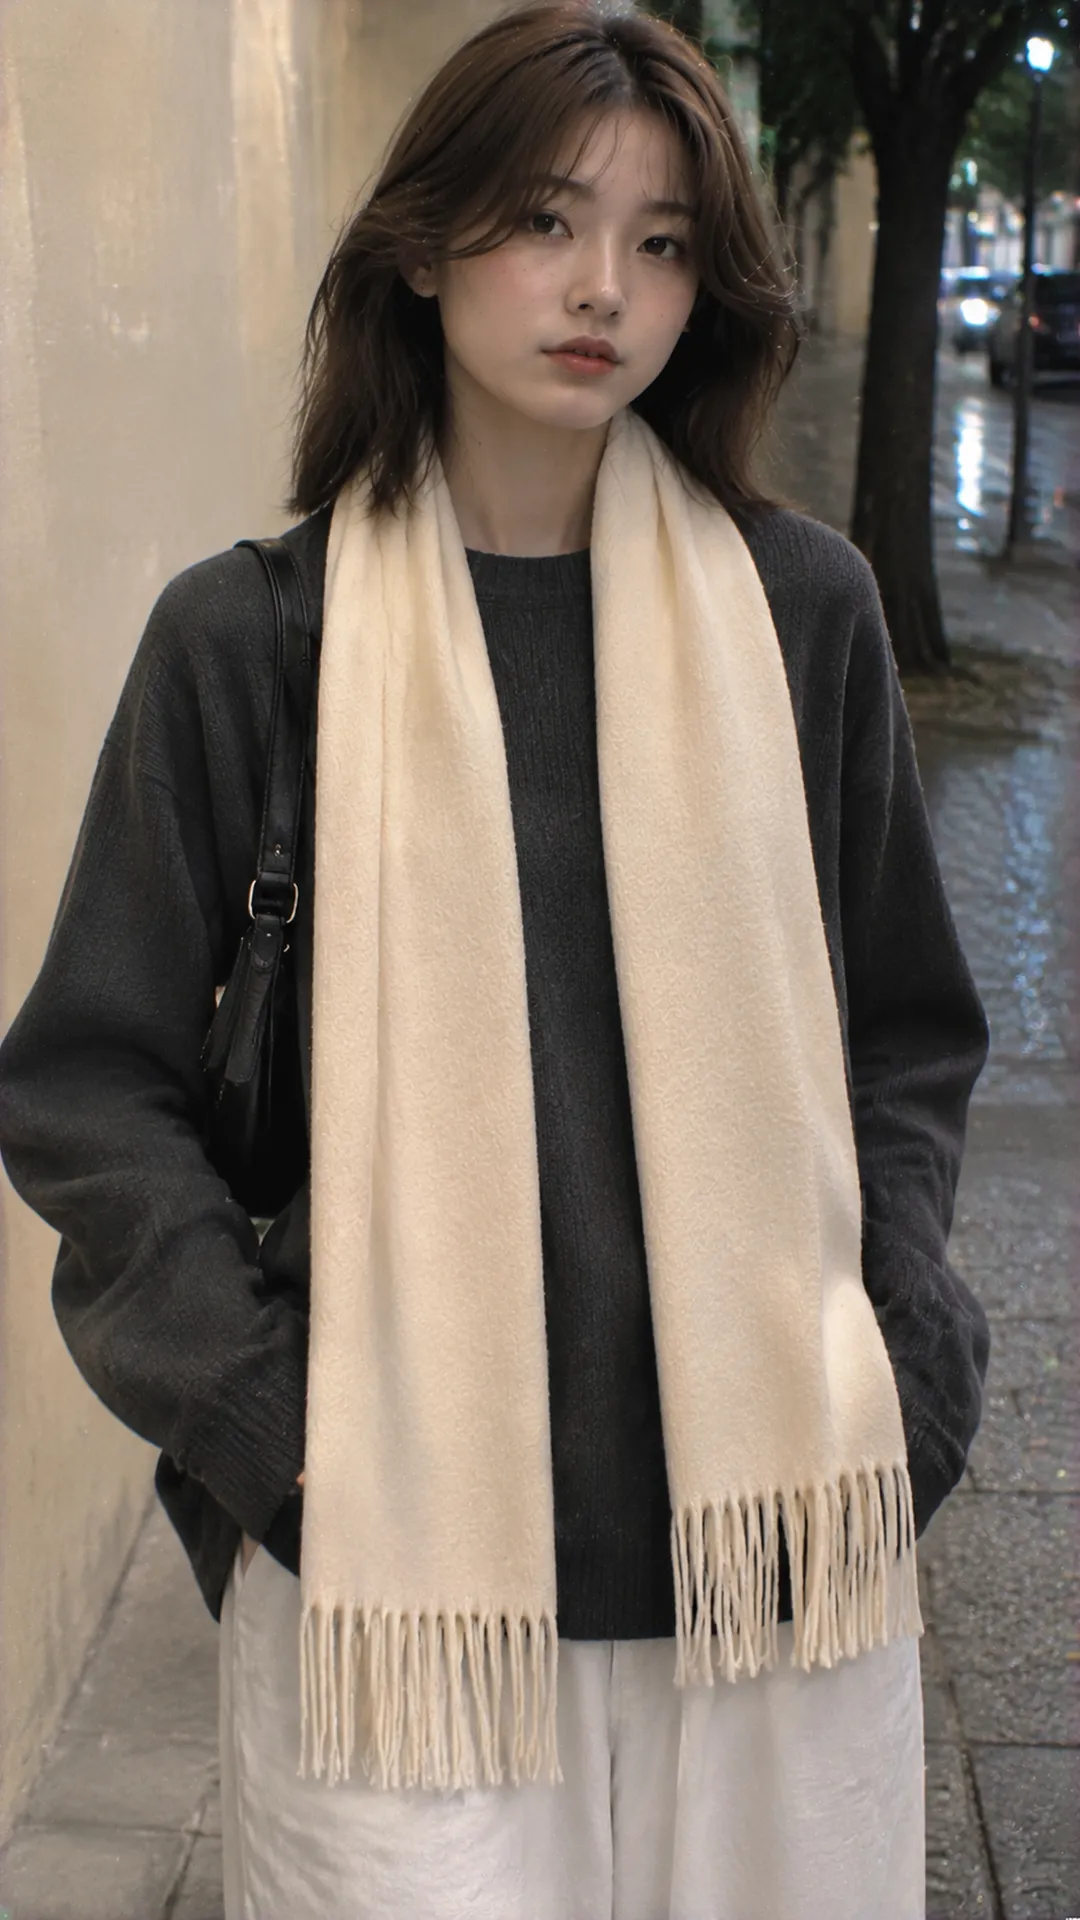
Open drape: let both ends show their length
- Fold the scarf to the width you want, or leave a lightweight scarf wide to cover more of your shoulders.
- Place the center behind your neck and let both ends fall in front over your top.
- Match the ends for a balanced look, or offset them slightly for a more relaxed drape.
- Check the scarf with your jacket open and closed. Keep both ends clear of the zipper and make sure they don’t pull the collar sideways.
The open drape leaves the print and length visible. Two hanging ends create vertical lines over a plain top. If it keeps slipping off as you walk, try a wrap or loop to hold it in place.
With a V-neck, the ends can follow the opening. A scarf adds bulk to an already covered area on a high neck, so try a lighter one if it bunches. Leave the ends uneven if you like the effect.
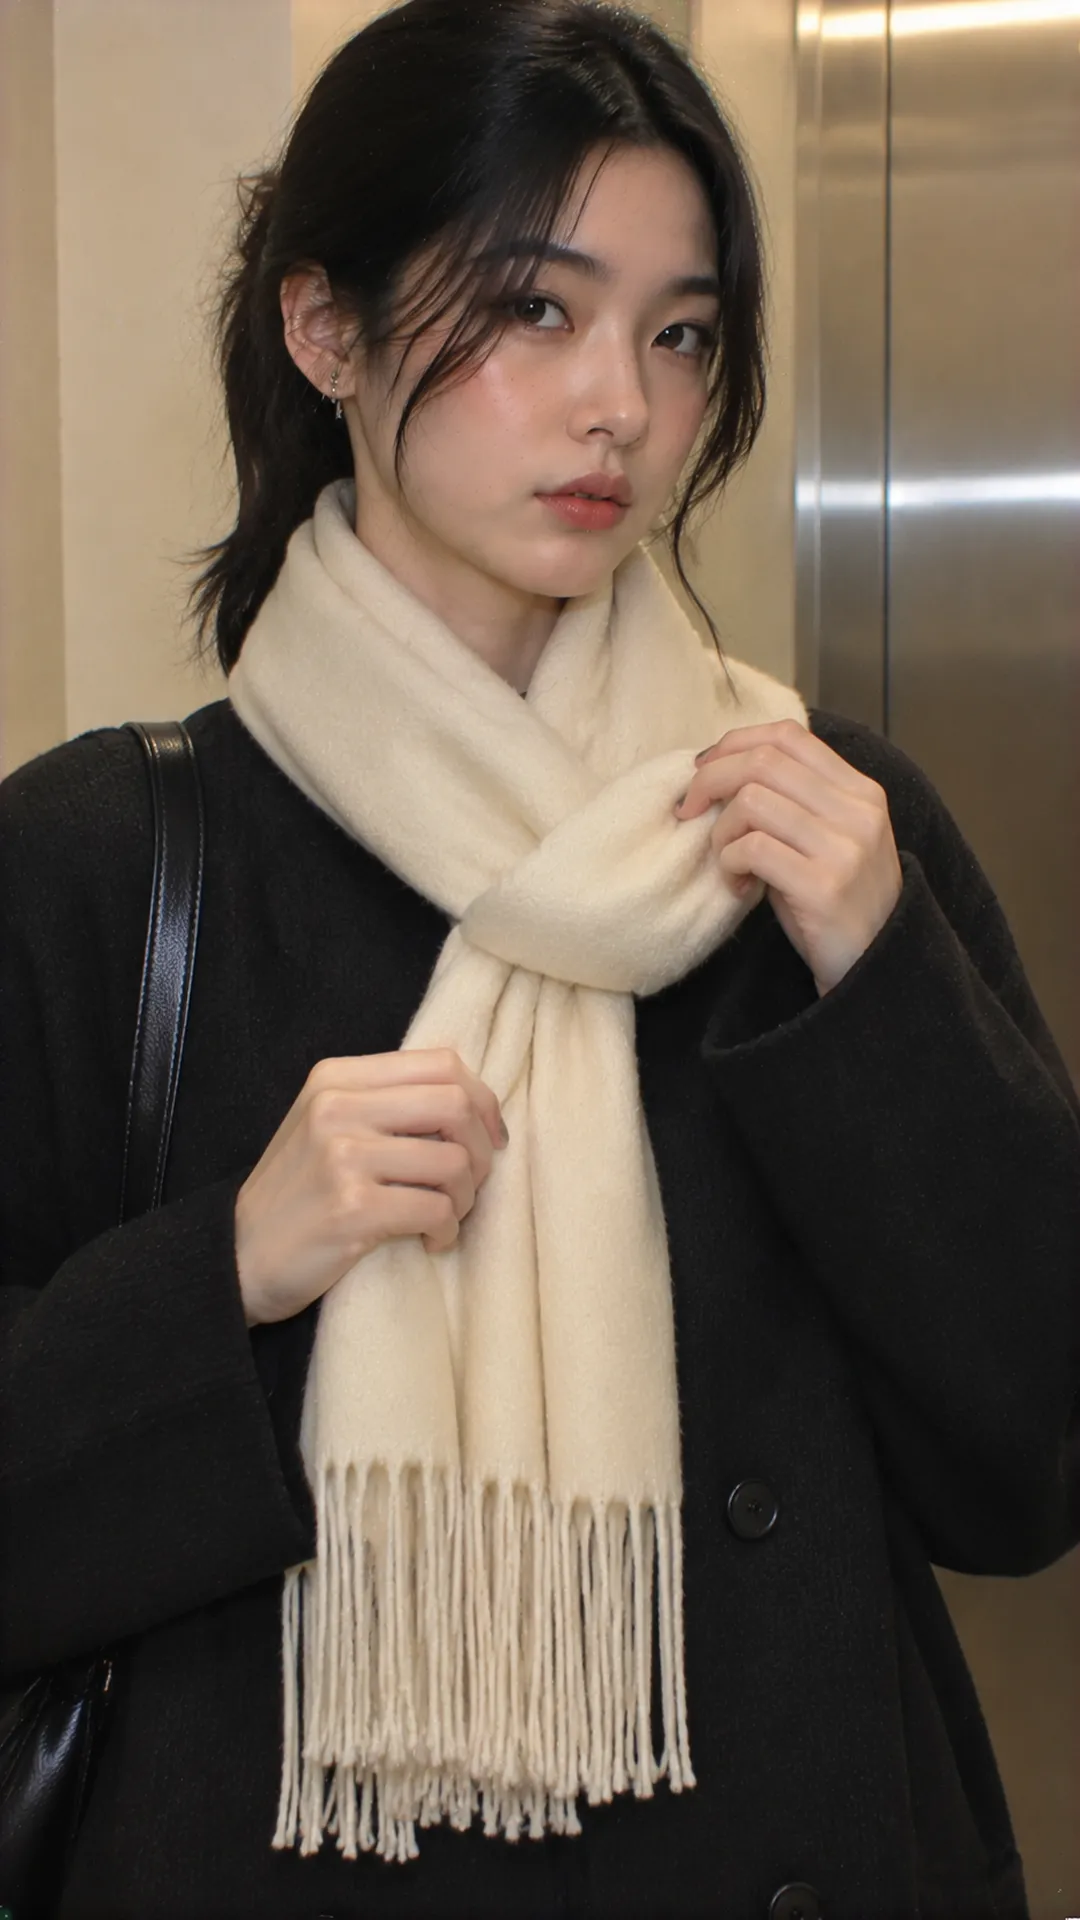
Single wrap: start with one end longer
- Place the scarf behind your neck with one end longer than the other.
- Bring the long end across the front of your neck and around the back, then return it to the front in the same direction.
- Loosen the wrap enough to move comfortably, then adjust the two ends to the length you want.
- Smooth out any twist in the wrap and check that the crossover clears the collar and any large buttons.
The longer end needs enough length to go all the way around and still hang where you want. If it comes up short, start with a bigger difference between the ends or use the open drape. Leave the wrap loose even if tightening it would gain a few centimeters at the ends.
A thick scarf gives the wrap a fuller shape that can work over a simple top. A thin scarf drapes more softly and leaves more of the neckline visible. Move the crossover slightly off-center if you’d like the focus to one side.
To take it off, loosen the wrap and unwind the end in the reverse direction. Pulling sharply on one end can tighten the scarf before it comes free. Practice removing it gently, especially if it has fringe or a surface that catches easily.
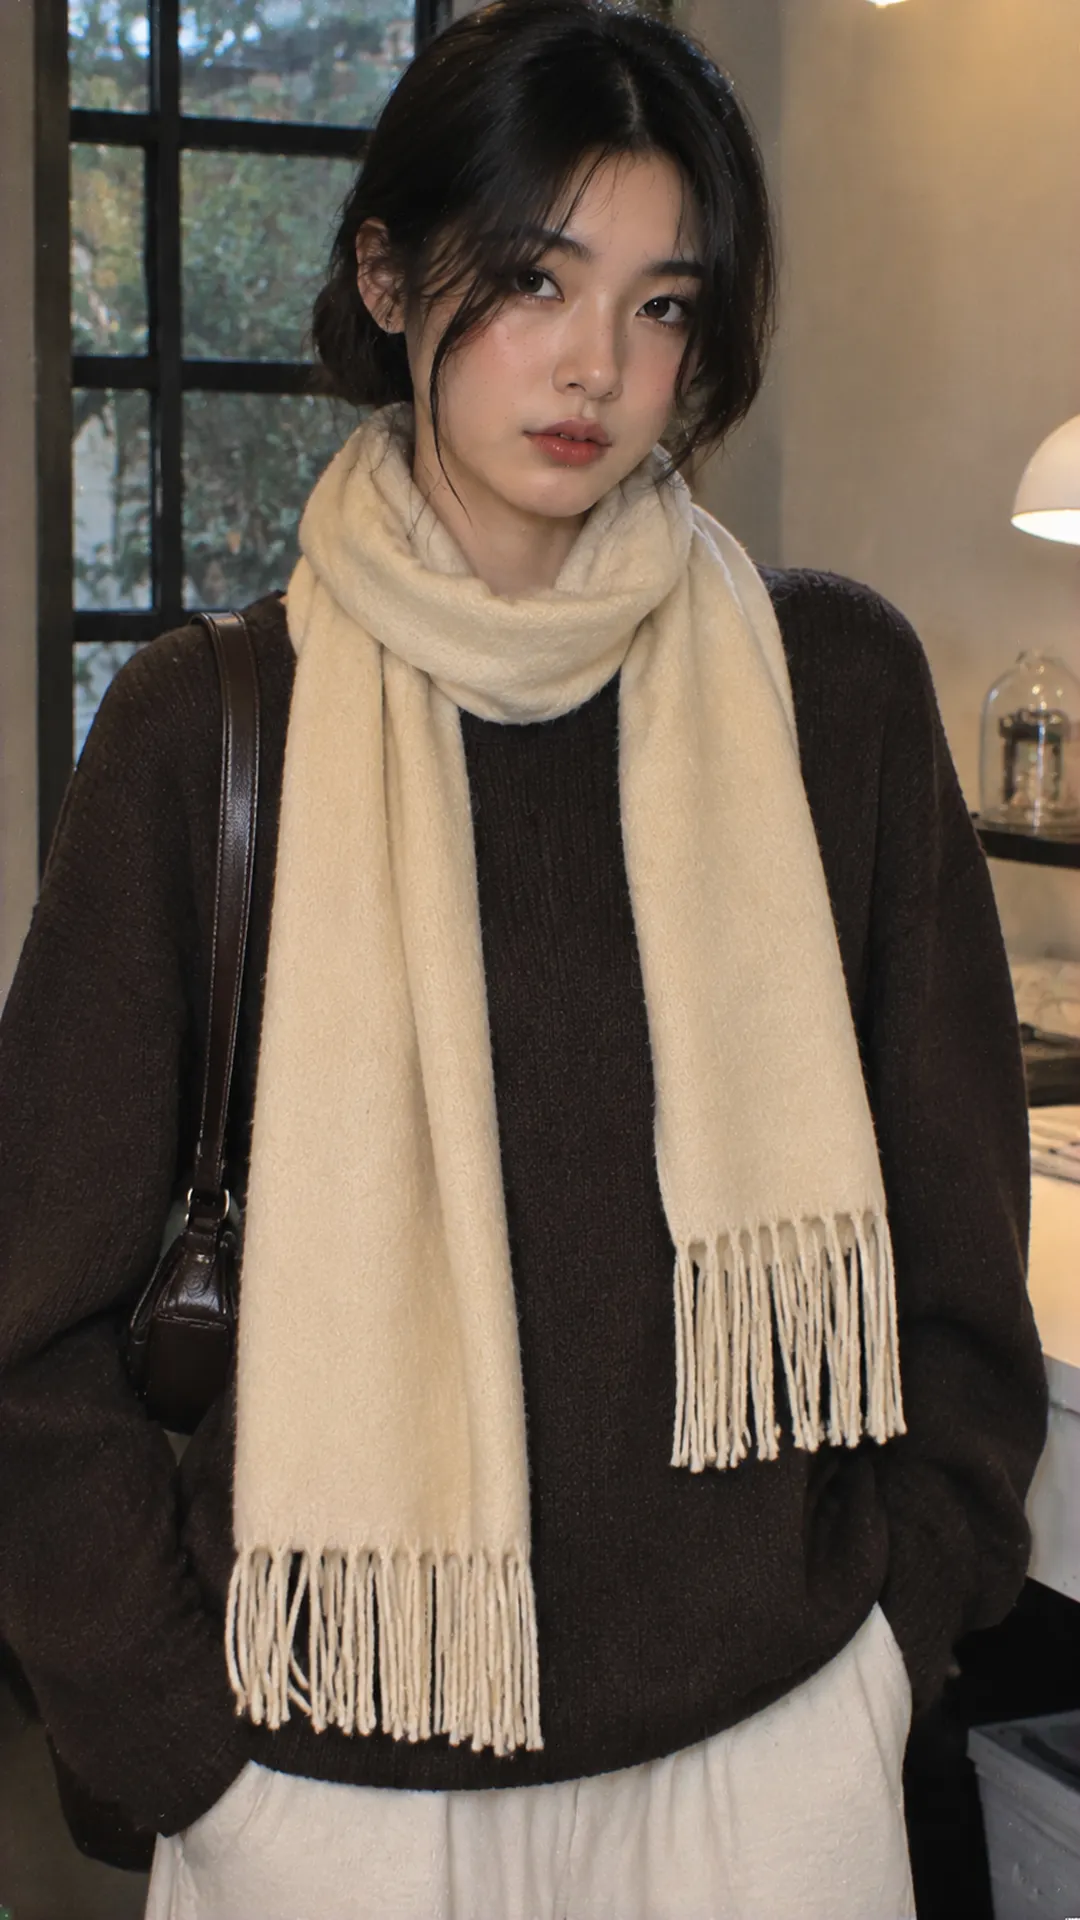
Folded loop: pull both ends through together
- Fold the scarf in half lengthwise to make a loop at one end and bring the two tails together at the other.
- Place the folded scarf behind your neck with the loop on one side and the two tails on the other.
- Bring both tails through the loop at the front.
- Pull just enough to hold the scarf in place, then loosen it around the neck and flatten the layers gently.
This style is easy to make and uses some of the scarf’s length at the loop. On a short scarf, the ends may hang only a little. A very thick scarf will make a bulky knot. Try a single wrap or an open drape if either is easier to wear.
With a reversible scarf, set the colors you want to show on the loop and the tails before pulling them through. Adjusting after tightening can twist the layers. Keep the loop loose enough to show its shape and remove it easily.
The folded loop creates a cluster at the front of the neck. Try it with a simple neckline. If the top already has a large bow or ruffle, the open drape gives each detail more space.
Off-center single knot for a thin or narrow scarf
- Place the scarf behind your neck and let the ends hang in front at roughly the same length.
- Cross one end over the other below the neck.
- Bring the upper end through the opening you’ve made, then pull gently to form a simple knot.
- Shift the knot to one side if you like. Keep it loose around your neck and smooth the two ends.
A low knot leaves more space between the neck and the tie. A high knot draws attention toward the face, so check for bulk. If a slippery scarf keeps coming undone when you move, try a different style and keep the knot loose.
A small print makes the knot easy to see against a plain top. If the top has a print too, use a shared color or lower the contrast in one pattern. Step back to see how the patterns work across the whole outfit.
Small bow for a long, lightweight scarf
A soft, light scarf works best for a bow. Practice on a flat surface to see whether you have enough length and whether the knot feels too bulky. If the band is wide, fold it narrower without twisting it into a cord.
- Drape the scarf loosely and tie a single knot where you want the bow.
- Fold one tail into a loop and hold it without pulling the scarf tighter around your neck.
- Bring the other tail around the base of the loop, fold it into a second loop, and pass it through the opening.
- Adjust each loop gently. Leave enough length in the ends and check that the knot stays comfortable as you adjust it.
A slightly uneven bow can look intentional. Check whether the knot stays in place. If it needs constant adjustment, a single knot or folded loop may be easier to wear to class or work.
A bow adds volume at the neckline. Try wearing fewer necklaces or skip long earrings that touch the scarf. Our guide to statement accessories for women helps you pick a focal point when hair, glasses, and a scarf are all near your face.
Work with the neckline you’re wearing
With a button-up, decide how much of the collar to show. A low knot and narrow band usually keep the collar clearer than a thick wrap. Turn your head and check whether the scarf pushes up the top button area or collar points.
With a V-neck cardigan, the ends can follow the opening. If the cardigan is buttoned up, a large knot may sit directly over the buttons. Move it off-center or change the tie. Our guide to choosing and styling cardigans explains how the neckline and front opening shape the outfit.
With a high-collared jacket, zip it to where you’ll wear it before testing the scarf. A style that works with the jacket open may feel crowded with the collar closed. Use fewer wraps or a thinner scarf if the layers restrict head movement.
If you’re still choosing a base top, our item-by-item styling guide can help you find the main piece first. Use the scarf to add color or shape once the top fits comfortably on its own.
Check the ends and move around before going out
Look at the ends while standing, sitting, and bending. Long tails can catch on a bag, zipper, or something you’re carrying. Change the wrap or choose a shorter scarf if the ends get in the way.
When riding or near moving parts, tuck the ends away and secure the scarf so nothing hangs near wheels or machinery. If you can’t secure it, take it off and stow it before moving. Choose a style that works for the activity.
If the scarf catches on an earring or button, stop and free the snag before pulling. After wearing, undo the knot gently, lay the scarf out to check it, and store it according to the care instructions. Loosen the knot fully before putting it away.
Start with two styles that suit the scarf you already own: a simple drape for busy days and a knotted style for a change. Once you can adjust the length, width, and room at the neck, those two styles can give you several looks.
If the print is mainly at the ends, pick a style that leaves them visible. If the pattern runs throughout, one wrap can bring enough color close to the face. Try turning the scarf over before changing the knot. The design you want may simply be folded inward.