

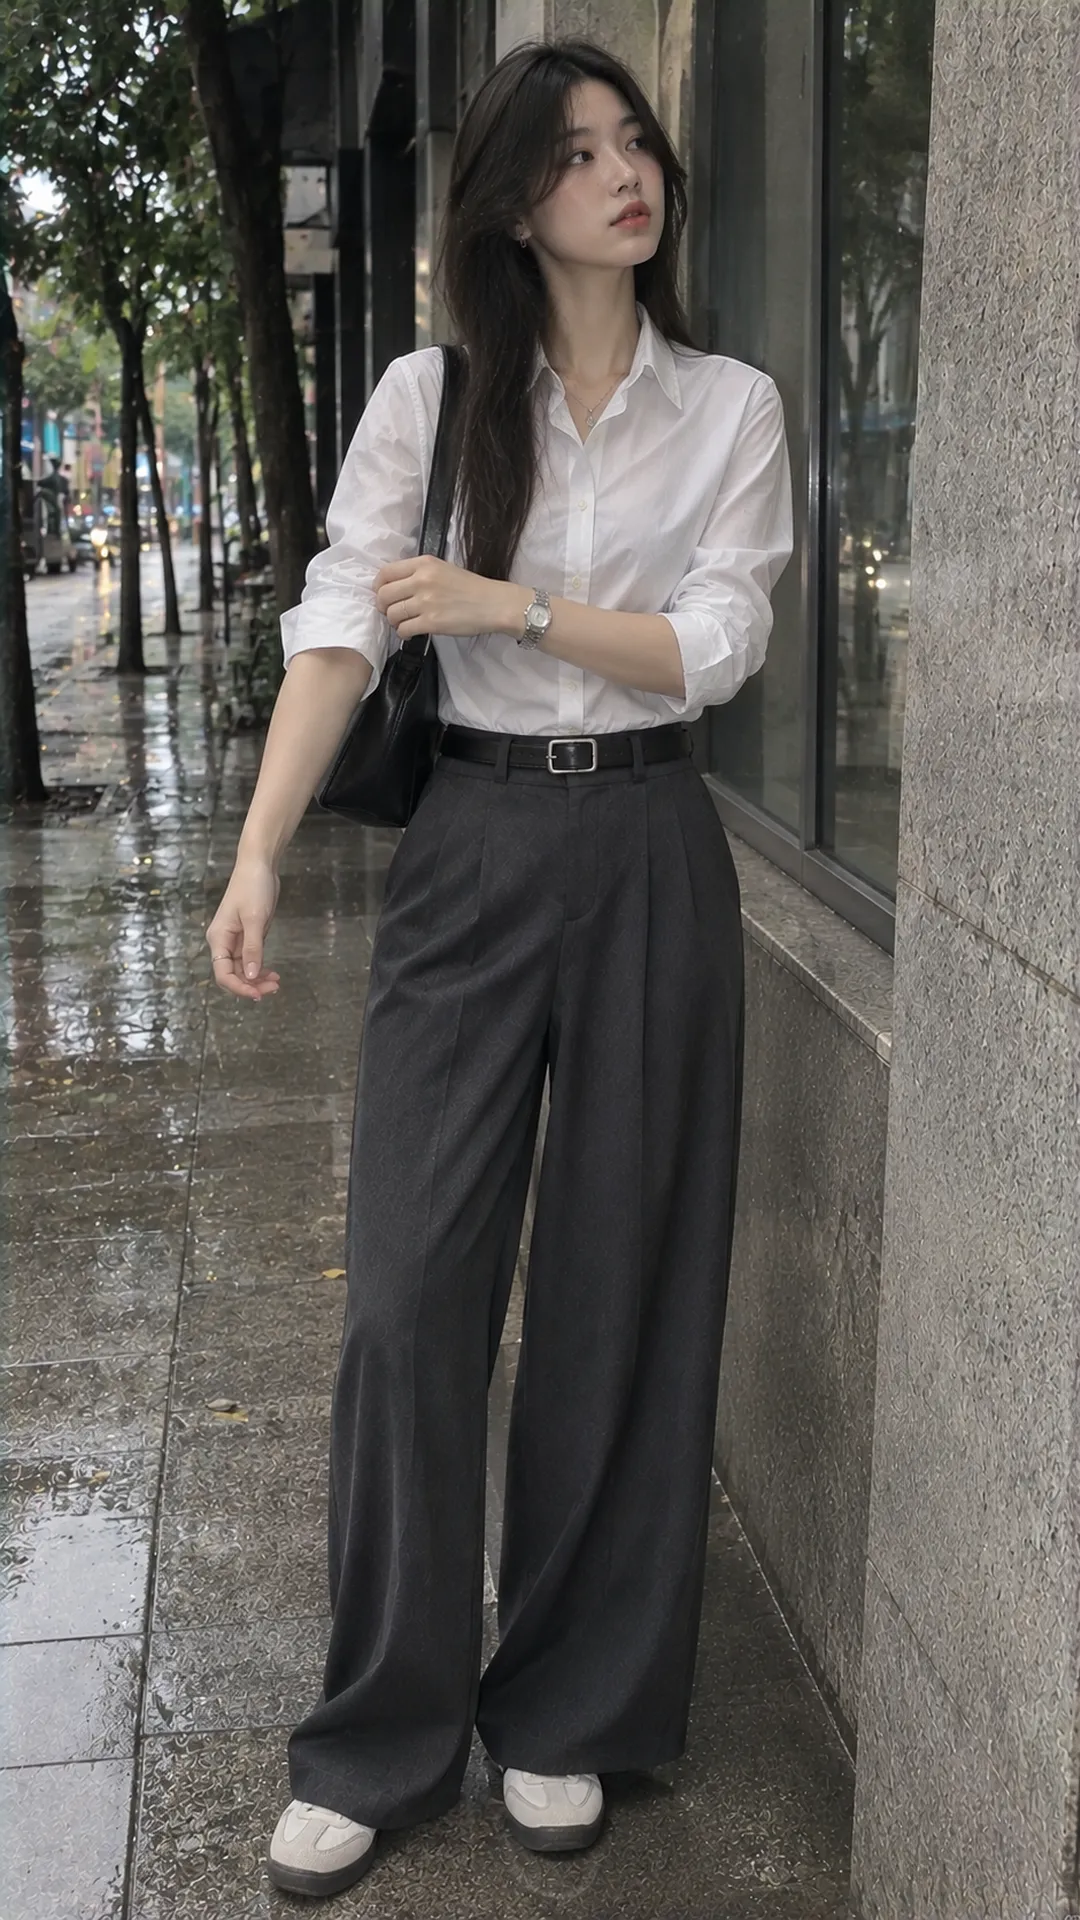
Check the cuff and sleeve vent before rolling
The cuff is the band at the end of the sleeve. It may have a single button, adjustable buttons, an extended band, or other details. Above it there’s often a vent that lets the sleeve open so your hand can pass through. Check for a small button at the vent before folding.
Undo the cuff button and, if necessary, the vent button. Avoid forcing a closed sleeve up your arm. With decorative buttons that don’t open, a narrow sleeve, or an unusual elastic cuff, check whether the design lends itself to rolling first.
Check the starting length with your arm relaxed, then reach forward. An already short sleeve can end higher than you intended after several folds. With a very long sleeve, the roll can feel bulky even when folded neatly.
When shopping online, ask for the sleeve length, cuff construction, and upper-arm measurement if you need it. Our online sizing guide explains how to compare those measurements with a shirt that fits. A well-fitting sleeve is easier to work with than one you have to roll to correct its length.

Method 1: A basic fold the width of the cuff
- Undo the buttons, straighten the sleeve, and smooth out any twists.
- Turn the cuff up once, using its width as a guide.
- Smooth the front and back of the sleeve so the fold is fairly even all the way around.
- Fold it up once more if you want a higher roll and the sleeve still has room.
- Bend your elbow, straighten your arm, and check that the fold isn’t pulling on the vent.
This roll keeps the wrist clear for writing, using a computer, or wearing a watch. It can stop well below the elbow. A low fold that clears the wrist often holds its shape better than several higher folds on a narrow sleeve.
If the cuff is long, check whether the first fold sits too high. Try another method to control how much cuff shows, or leave the sleeve down and adjust the button. Folding a stiff cuff in half can leave a crease you didn’t want.
Repeat on the other sleeve, then compare both with your arms relaxed. The widths and positions can be close without matching to the millimeter. If one sits much higher because the sleeve twisted, unroll it and start again.

Method 2: A roll that leaves part of the cuff showing
Try this roll to show the inside of the cuff or get a defined two-layer look. Undo the buttons and smooth the sleeve. Turn the cuff up above where you want the roll to finish, leaving a length of sleeve fabric below the turned-up cuff.
Fold that fabric up over most of the cuff and leave as much of the edge showing as you like. Adjust the fold all the way around. Bend and straighten your arm to see whether the visible edge stays in place or slips inside the roll.
The starting height depends on the shirt. A narrow upper sleeve can feel tight before you even make the fold if you pull the cuff too high. Start low and move up only while you still have enough room to move.
A contrasting cuff can become an accent in the outfit. If the shirt already has a large print, try showing a narrow edge. A matching cuff still gives the roll a different look through its fold and texture.
A slightly uneven fold can suit a relaxed outfit. Check that it stays where you want it and lets your arm move. Adjust the folds that are slipping and keep any variation you like.
Method 3: A higher roll when there’s enough room
Try a higher roll only if the sleeve is wide enough where it will end. Make a basic fold first, then go higher in small steps and check the fit each time. If the roll ends right where your elbow bends, try moving it a little higher or lower to see what feels better.
If the roll feels tight, unfold a layer or move it down before trying to push it past the elbow. You should be able to bend your arm naturally. Deep marks, a pinching feeling, or having to hold your arm in one position are signs to adjust it.
A higher roll adds more volume around the arm. On a very loose shirt, thick rolls can make the outfit feel heavy. Try fewer folds, a lighter shirt, or sleeves left down if the roll in your reference photo doesn’t suit your shirt.
If you wear the shirt as an outer layer, take it off and put it on again to see what happens. The folds may shift as your arms slide over the base layer. If you’ll put it on and take it off repeatedly, choose a roll that’s easy to redo.

Adjust for surface texture and fabric weight
A crisp shirt: Smooth each fold before making the next. Once it lies flat, leave the fabric loose enough to stay comfortable. A thick, stiff roll can make the wrist area look bulkier than you want.
A soft, drapey shirt: Support the sleeve all the way around as you fold, so you aren’t pulling only at the front. Try fewer folds and a moderate height. If the roll won’t hold its shape, keep the softer look or choose another shirt when you need a neater wrist.
A slippery fabric: Move your arms a few times before leaving to test the roll. If it slips, change the fold or its height before tightening it. Use a roll-up tab as designed if the shirt has one.
A thick shirt: Watch for bulk at the sleeve seam and cuff. One turn may be enough. If you need several folds to reach the height you want, consider whether the shirt suits what you’ll be doing.
Ease of rolling depends on sleeve construction, fabric thickness, and finish as well as the fiber. If you’re shopping for a shirt, our women’s tops guide can help you choose for fit and use.
Why does the roll slip, twist, or bunch?
The roll falls after a few movements
Check whether the first fold lies flat and whether the layers run in the same direction. If the cuff is too wide or the fabric slick, change the height or fold and try again. If it still slips, leaving the sleeve down may save you from adjusting it all day.
The front looks neat but the back bunches
Unroll the sleeve and smooth it all the way around. Turn your wrist to see the back, distribute the fabric with your other hand, then fold one turn at a time. Pushing the bunch into the roll can make one area thicker and pull the fold off-center.
The rolls sit at very different heights
Compare the number of folds, the width of the first fold, and the vent buttons. One side may still be fastened. Line up the folds by where they sit on your arms when relaxed.
The vent opens more than you want
Lower the roll or choose a fold that covers more of the opening. Avoid refastening a button that’s already under strain. If you need consistent coverage, try a sleeve design that gives it to you comfortably.

Try it with watches, bracelets, and outerwear
A rolled sleeve can leave room for a watch, but the fold shouldn’t sit on the face or buckle. Put the watch on before settling on the height. If you wear several bracelets, bend your arm to check whether they catch on the cuff and remove a piece if needed.
If you want the wrist to draw attention, keep other parts of the outfit simple. Our guide to alternative accessories for women helps you choose where to place an accent. You can also leave the wrist bare.
With a blazer or jacket with relatively narrow sleeves, a thick shirt roll can bunch underneath. Try wearing the shirt sleeves down under the jacket, then rolling them when the jacket comes off. Change the roll to suit what you’re doing throughout the day.
Check before leaving and unroll after wearing
Put your hands on a desk as you would at work, pick up your bag, bend your elbow, and lower your arm. Check that the fold stays as neat as you need it to, clears what you’re handling, and doesn’t pull at the shoulders. Our guide to styling women’s shirts helps you carry the same look through to the trousers and shoes.
After wearing the shirt, unroll the sleeves and check the cuffs before following the care label. Check the heat setting before pressing the folds out. For special cuff construction, follow the product instructions.
If you’re buying a shirt to wear rolled up often, try rolling the sleeves in person and see how easily it works. Our alt-fashion shopping guide brings together advice on checking sizing and product information. A shirt that suits the job will make the roll easier from the start.